These days, with email clients like Gmail creating tabs to sort your inbox automatically, whitelisting your favorite email addresses becomes more important than ever. Have you ever waited on an email, gotten frustrated when you couldn’t find it, just to realize that it wound up sorted into the wrong tab? While email clients rework their algorithms frequently and use artificial intelligence to constantly improve the function of their tabs, they don’t work perfectly. That’s where whitelisting comes in.
What is Email Whitelisting?
To whitelist an email address just means you add that address to your approved senders list. That's it! This tells your email client that you know this sender and that you trust them, which will keep emails from this contact at the top of your inbox and out of the junk folder.
Why should you whitelist your favorite email senders?
Plenty of people don’t even realize they have this ability, not how easy it is! Here are a few reasons why you should waitlist for favorite senders:
- Whitelisting leads to improved deliverability.
- Your won’t miss an email from your favorite camps. After all, you registered for that camp for a reason!
- Emails from your favorite camp director will land in the inbox every time - you don't want to miss out on any camp related emails.
How do you whitelist?
Whitelisting is a quick, one-time-only task to ensure your favorite email senders get added to your address book or safe senders list. And, to do this, all you need to do is open an email message and verify the sender can be trusted:
Here are some simple instructions on the most popular email service providers on how to guarantee the emails that you want get delivered to your inbox - be sure to click each image for larger view:
Apple Mail (OS X and iOS devices)
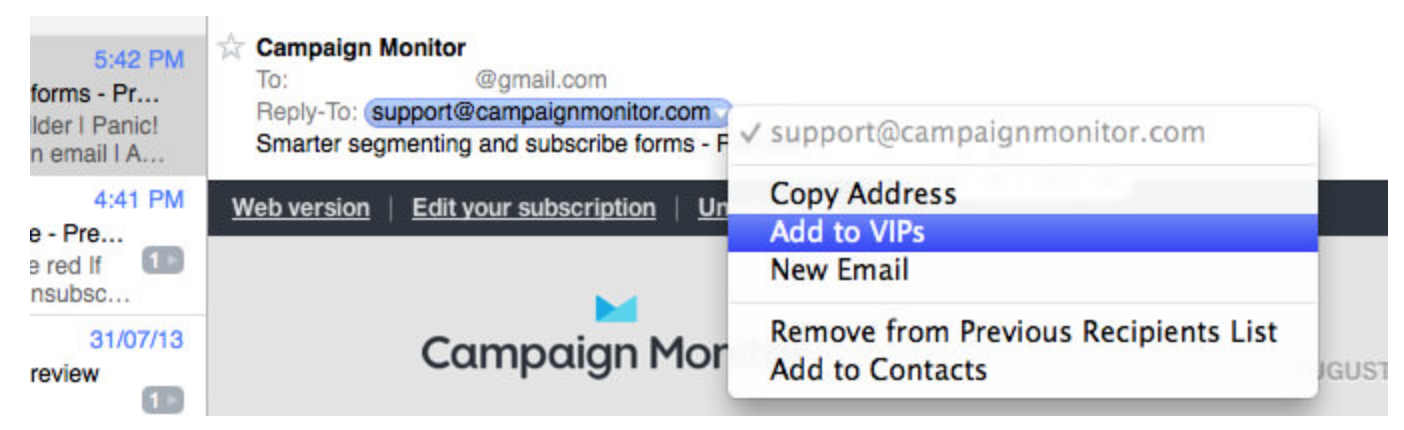
Both Apple Mail on OSX and Mail on iOS devices have a similar process for adding senders to Contacts. By selecting the From, or Reply-to on an email message, you can choose to “Add to Contacts” or “Add to VIPs.” While both options will add the email address to the whitelist, the advantage of “Add to VIPs” is that future emails from this sender will be added to a special VIP mailbox in iOS Mail.
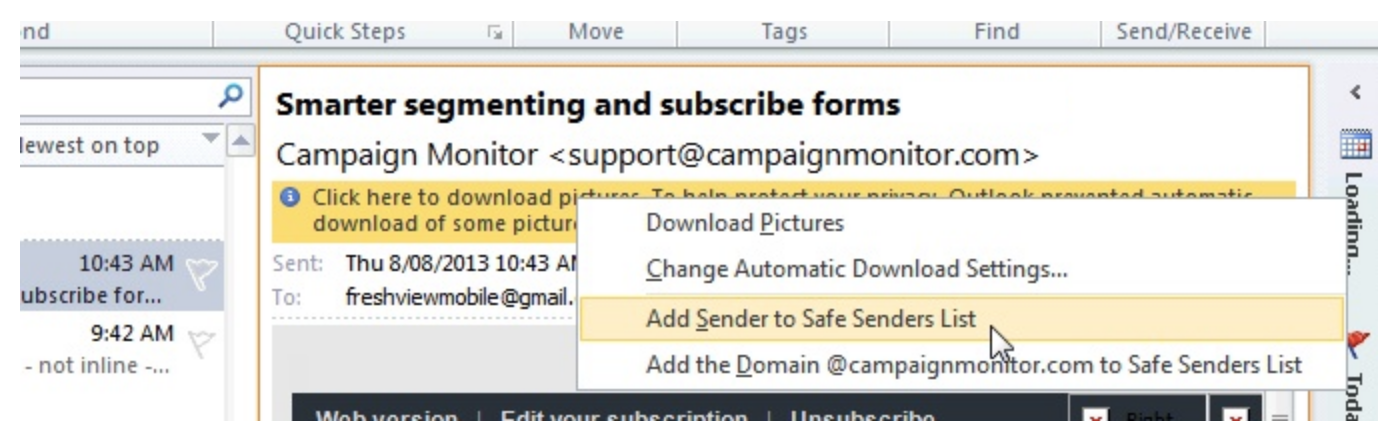
Outlook 20XX
When opening an email from a sender, an alert at the header of the message, “Click here to download pictures…” should display. Click this and select, “Add Sender to Safe Senders list:”
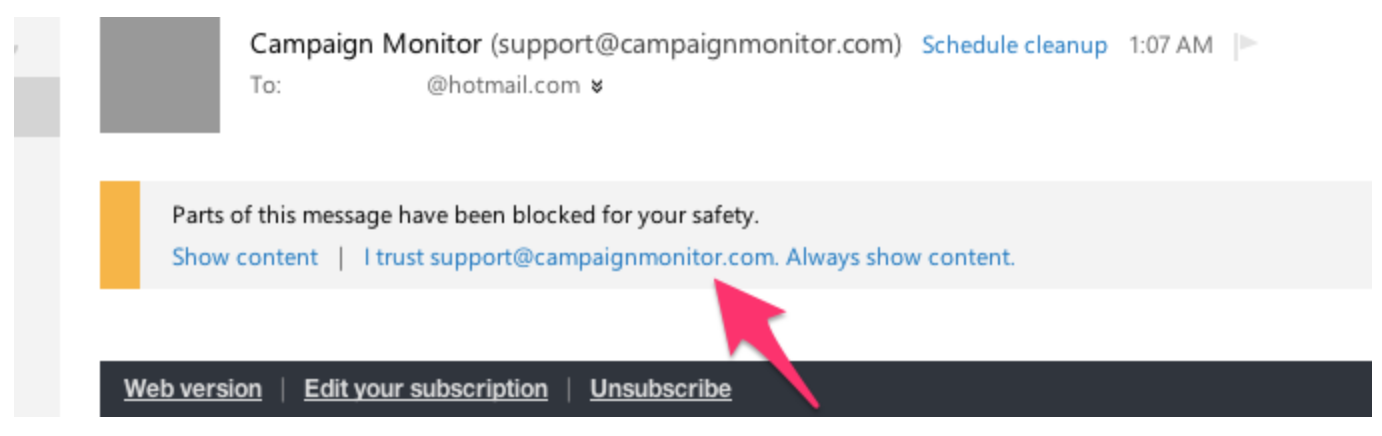
Outlook.com
After opening an email message, an alert message should display with, “Parts of this message have been blocked for your safety.” Beneath this, click the link with, “I trust sender@theirdomain.com. Always show content:”
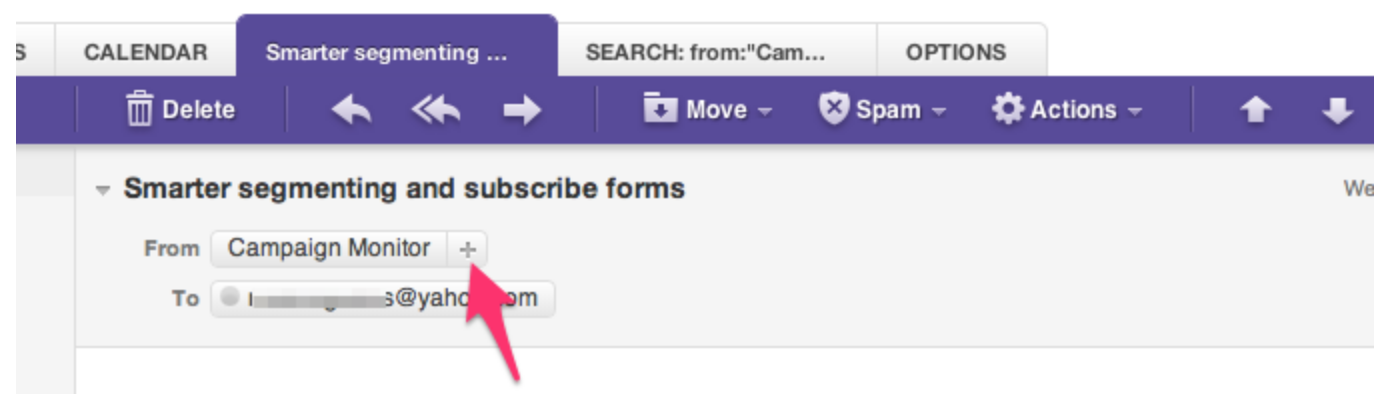
Yahoo! Mail
When opening an email message, a “+” symbol should display next to From: and the sender’s name. Select this and an “Add to contacts” pop-up should appear. Select “Save:”
Gmail (Webmail and mobile)
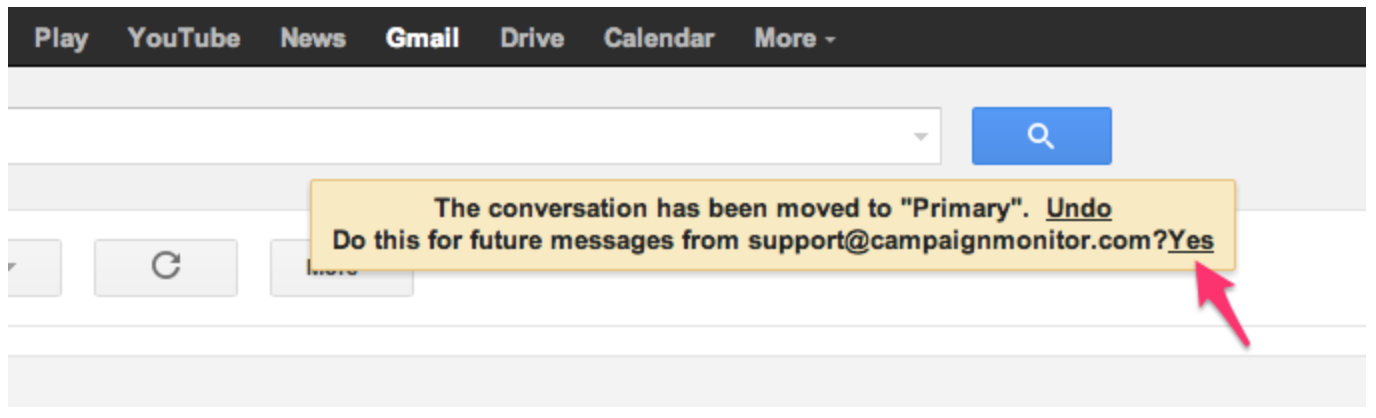
Getting all future emails from a sender to appear in the “Primary” tab (instead of “Promotions”, or elsewhere) is a quick, two-step process.
First of all, drag-and-drop the email message from beneath the tab it’s currently filed under, to the “Primary” tab:

Once done, a message alert will appear with, “This conversation has been moved to Primary. Do this for all future messages from sender@theirdomain.com?” Select “Yes:”
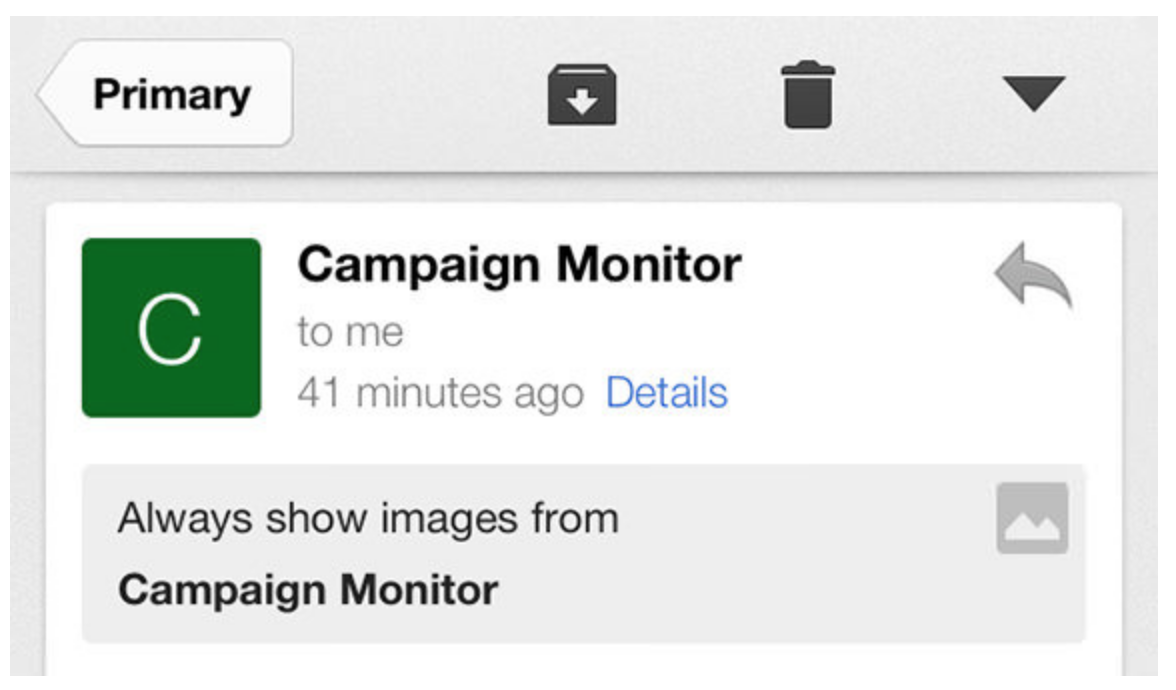
Gmail on mobile devices doesn’t provide a way to prioritize messages. However, touching “Show images” then “Always show images from Sender” will ensure that images always display in the inbox:
Android (Default client)
On Android devices, open the email message and touch the picture of the sender that displays before the message. Tap “Add to Contacts.”
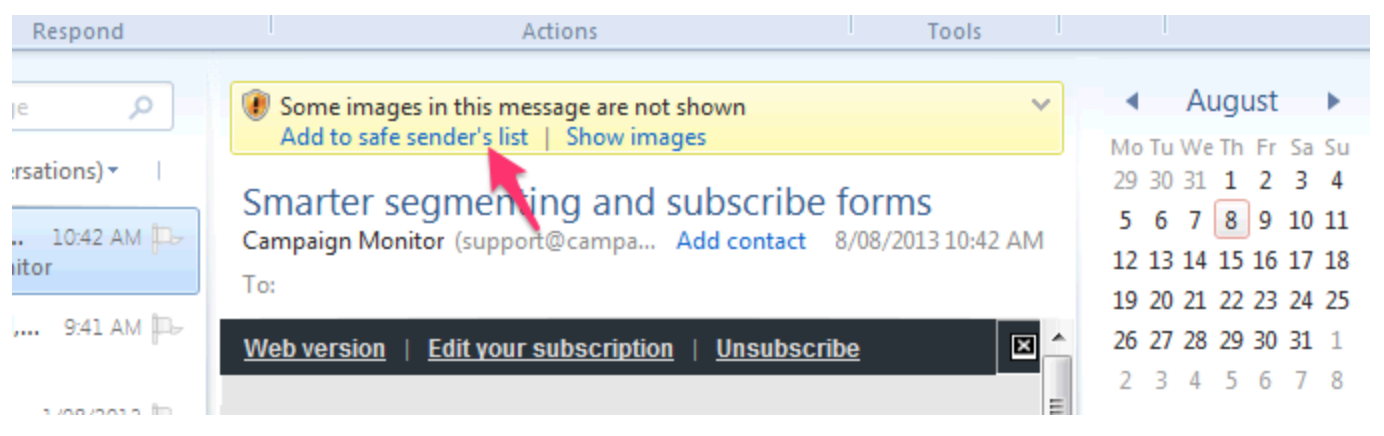
Windows Live Desktop
After opening an email message in Windows Live Desktop, an alert in the preview pane with, “Some images in this message are not shown.” will display. Select the link, “Add to Safe Senders list.”
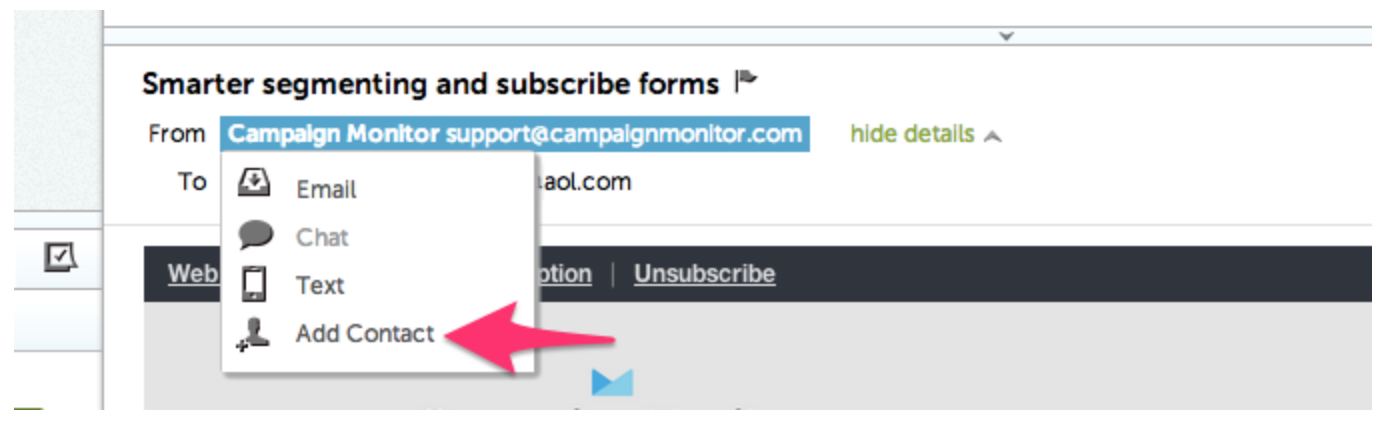
AOL Mail
In the preview pane for an opened email message in AOL Mail, select the sender’s From name under the email’s subject line and select “Add Contact” from the drop-down menu: